
My Version

I have heard interesting stories about the origin of donuts/doughnuts, but, I can't recollect where I heard them from.. I bet, it's all made up. Anyway, I'll share with you two interesting stories. One is really silly and the other seems to have a logic somewhere. The first one goes like this - Once upon a time a cow kicked a pot of hot oil onto some dough, and that was how the idea of frying dough into donut evolved.. :) Well, the next story is something like this - A woman used to make pastry for sailors who went on long voyages. On each voyage, she'd make something new. Once, she ran out of time to bake, so she decided to fry the dough. She fried dough into small cakes and set it off with the sailors. But, on their return, they said that the new pastry was delicious but, the dough hadn't cooked through, and they fed it to seagulls. So, the next time they set out for the voyage, she made the cake and stuck a hazel nut in the centre of each cake and she named it doughnut. But, the captain of the ship hated hazel nuts and thus on their next voyage she decided to make a hole in the centre which turned out to be a hit. On each trip she improvised on her doughnuts. She dunked them into sugar syrup once, yet again she coated them with chocolate and so on.. :) :D

I have heard interesting stories about the origin of donuts/doughnuts, but, I can't recollect where I heard them from.. I bet, it's all made up. Anyway, I'll share with you two interesting stories. One is really silly and the other seems to have a logic somewhere. The first one goes like this - Once upon a time a cow kicked a pot of hot oil onto some dough, and that was how the idea of frying dough into donut evolved.. :) Well, the next story is something like this - A woman used to make pastry for sailors who went on long voyages. On each voyage, she'd make something new. Once, she ran out of time to bake, so she decided to fry the dough. She fried dough into small cakes and set it off with the sailors. But, on their return, they said that the new pastry was delicious but, the dough hadn't cooked through, and they fed it to seagulls. So, the next time they set out for the voyage, she made the cake and stuck a hazel nut in the centre of each cake and she named it doughnut. But, the captain of the ship hated hazel nuts and thus on their next voyage she decided to make a hole in the centre which turned out to be a hit. On each trip she improvised on her doughnuts. She dunked them into sugar syrup once, yet again she coated them with chocolate and so on.. :) :D
Well, now let's get back to making our donuts.. Making donuts are easy, provided you use fresh yeast. I have tried many methods of making donuts, but, this one was the most successful one out of them.
Dry Ingredients :
| ||||
All Purpose flour
|
-
|
3 and 1/2 cups
| ||
Caster Sugar
|
-
|
1/4 cup
| ||
Salt
|
-
|
1/2 teaspoon
| ||
Dry yeast
|
-
|
2 teaspoons
| ||
Hot water
|
-
|
1/4 cup
| ||
Sugar
|
-
|
1 teaspoon
| ||
Wet Ingredients :
| ||||
Fresh Milk
|
-
|
1 cup
| ||
Egg
|
-
|
1 large
| ||
Vegetable shortening
|
-
|
4 tablespoons
| ||
For the syrup :
| ||||
Sugar
|
-
|
2 cups
| ||
Water
|
-
|
2 cups
| ||
Cinnamon stick
|
-
|
1 stick
| ||
Vanilla essence
|
-
|
1 teaspoon
| ||
Other Ingredients :
Oil
| ||||
Icing Sugar
|
-
|
3/4 litre
| ||
Chocolate
| ||||
Butter
| ||||
Sugar strands
| ||||
Preparation Method :
| ||||
In a bowl pour in the hot water and a teaspoon of sugar.

Then add the yeast.
Tip : Always make sure you use new yeast. If your yeast is old, it will not give desired results. If you are using instant yeast, make sure you refrigerate it and store in tight containers once you open the pack. I buy the 11 gram packs. It's very convenient.

Don't stir with a spoon, just shake the bowl and allow to rest for 10 minutes in a warm place.
| ||||
Meanwhile sift all the dry ingredients. When you measure ingredients, be sure to follow exact measures.

Then whisk the egg until it fluffs.
 | ||||
Whisk in the Vegetable shortening. I have tried substituting the shortening with both oil and butter, but, trust me, nothing works as good as shortening.

By now, the yeast would have risen well. If it hasn't, then, your yeast isn't good enough. Don't risk wasting other ingredients without good yeast. Add the yeast and blend all the wet ingredients well.

Then blend in the milk and add the dry ingredients and combine well.

We will end up with a sticky dough and that's exactly how we want it.

Cover the dough with a plastic wrap and leave to rise for 1 and 1/2 hours as seen in picture below.

Flour a clean and dry work surface and empty the dough onto it . Dust the dough with some more flour and start kneading it well until the dough comes out clean and isn't all that sticky anymore.

Loosely wrap the dough in the same plastic wrap and leave to rise for another 15 minutes. If your dough is rising well during these intervals, you have a perfect donut dough in hand. :)

Dust the work surface with a scant amount of flour. Also dust the dough and rolling pin with some flour and start rolling the dough out. The dough is really elastic and you require some energy to roll the dough out.

Roll it out into a half inch thickness and leave for another 10 minutes. It will rise by another 1/4 inch.

Either use a donut cutter or you can also use any rounded objects to cut out into the desired shape.

Then separate the donuts from the rest of the dough and reuse the remaining dough to roll out into another batch.

Place the dough onto a floured surface and leave to rise for another 10 minutes.

I like making small donuts for kids. So, roll out the dough into 1/3 inch thickness and cut out small rounds.

Then with your finger make a hole in the centre and stretch out.
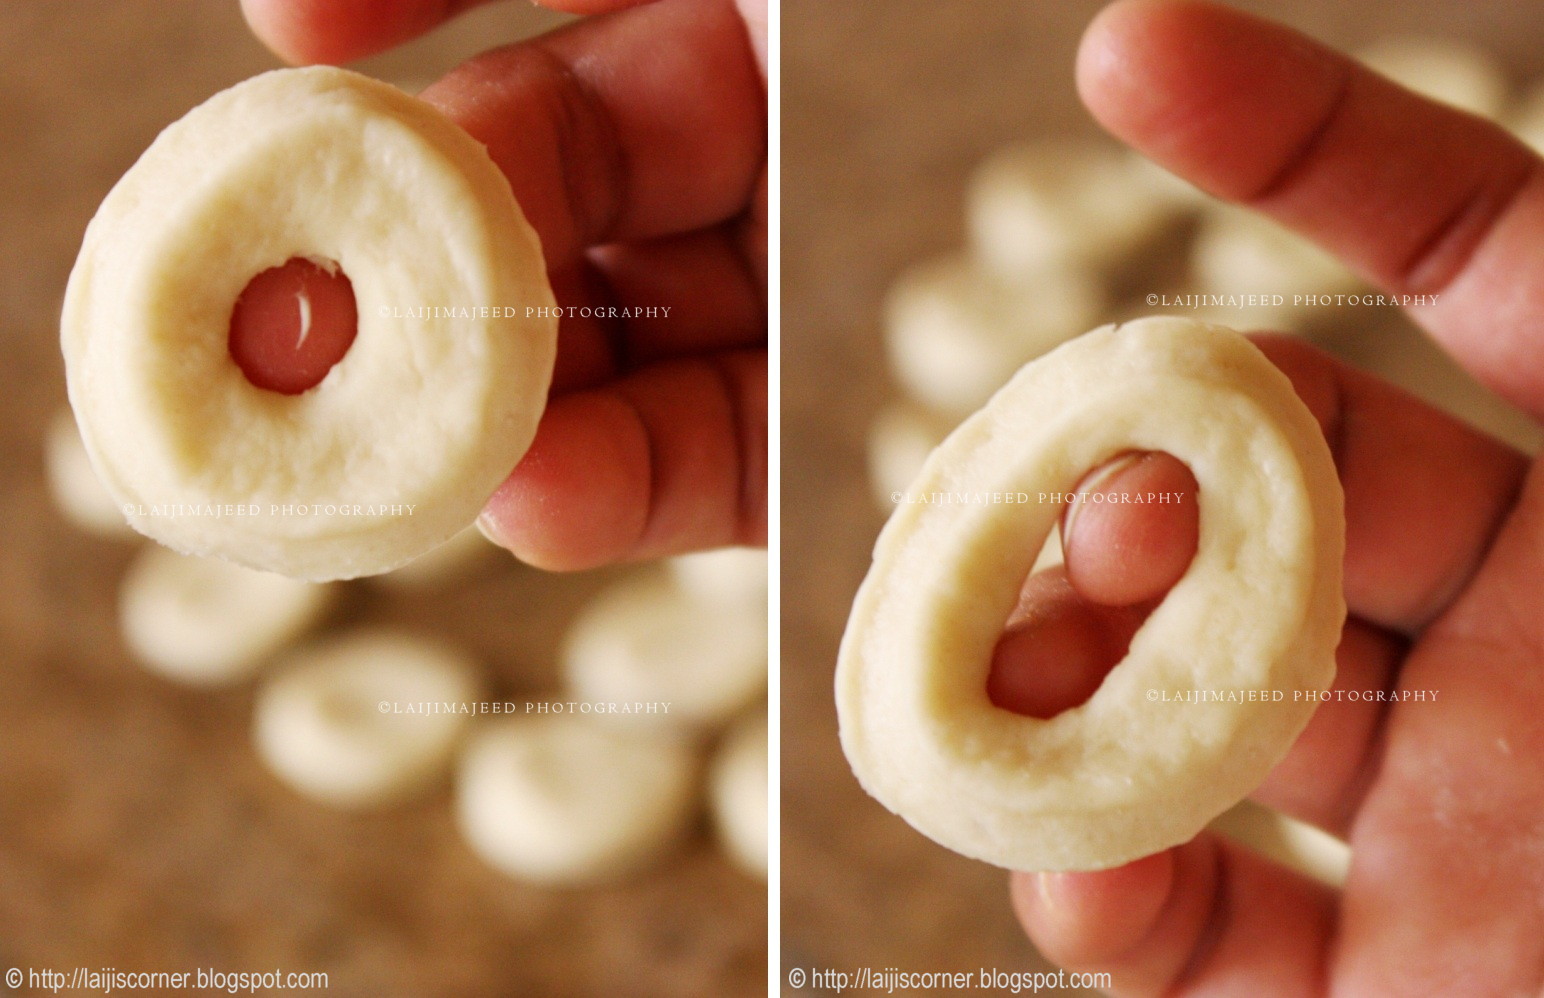
Repeat the steps again with the left over dough until you use up all the dough. I've made 16 large donuts and 35 small ones with this given measure.

Into a saucepan, or a flat pan, pour in the water and add the sugar. Do not stir. Just heat it on medium flame until the sugar dissolves and the water begins to boil.

When the water boils and begins to thicken drop in a cinnamon stick for some flavor. Then pour in the vanilla essence.

Once the water has reduced and comes down to a syrupy consistency, turn off the flame and allow to cool. We Do not want a sticky and thick syrup.
Meanwhile in a shallow pan, pour in the oil and heat it up until you see tiny bubbles at the bottom of your pan. If you have a kitchen thermometer, that should be something like 350-370C.

Then gently and carefully fry the dough. Make sure you test one first. Do not overcrowd your pan. Fry until donuts turn golden brown on both sides and strain them onto kitchen paper towels.

When you have finished frying the donuts, and when your syrup has slightly cooled. Dunk in the donuts into the syrup for a couple of seconds each. If you want slightly soggy and really sweet donuts, leave them in the syrup for 1-2 minutes.

Strain them out.

Sift few donuts with icing sugar for plain donuts.

If you want chocolate glazed donuts - Place chocolate chips or chopped chocolate into a Pyrex dish and microwave for 1 minute.

Remove and stir and microwave for another 1 minute and blend until the chocolate pieces melt completely. Then add a pint of butter and blend well until the butter melts completely.

Dip one side of the donuts into the melted chocolate and sprinkle on some coloured sugar strands or almond flakes..

Be a little creative.. allow your kids too to decorate the donuts.. :)
 | ||||
It's as easy as that to come out with some fancy donuts :)

MmMmmm.. I just couldnt resist ;) Had to have a bite.. Want some?? :) What are you waiting for?? Give it a try.. :)
 | ||||


